When you are hosting a meeting, there are several options available that you may wish to take use of. Across the top of the meeting window, you will see toggles to show the attendees list or chat pane, the option to raise your hand, the breakout room controls and the more options button, signified by three dots.
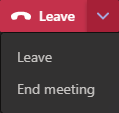
Further across, you will see the icons to mute your camera and microphone, the share icon, and the leave button. You can see that the leave button has a drop-down button attached, this gives you the option to end the meeting for everyone if you are the meeting organiser.


When sharing with your attendees, click the share button on the top bar to see what windows or screens are available. If you share a screen, all windows on that screen are visible to your attendees, so be careful with this option. If you share a window, only the contents of that window are shown.
At the top of this panel, there is an option to include your computer’s sound with the share. If you wish to show a video and include the sound, you will need to enable this option. This is disabled by default, as any sound that your computer plays, also plays on your attendees’ computers. The sound option is only used for screen and window sharing.

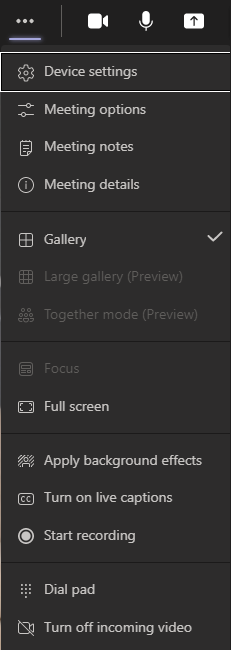
Further options can be found in the ‘more’ menu.
In device settings, you can switch cameras, speakers and microphones.
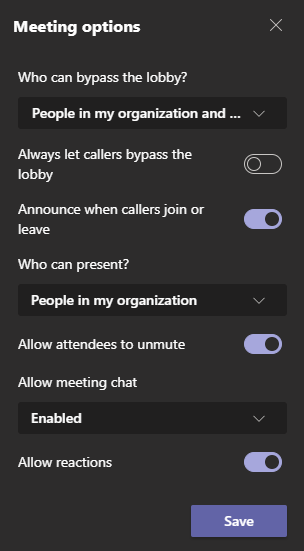
In meeting options, you can change the presentation permissions to allow guests to present, disable the option for attendees to unmute themselves, disable the chat, and more.
Meeting notes will take your Teams window to a screen where you can take notes that are automatically shared with your attendees.
In meeting details, you will see a button containing the link that is shared with attendees.
Lower down, you can see the options to go full screen, change your background, turn on automatic captions, record this meeting, and turn off incoming video.

